
Product photography is the heart of e-commerce. Whether you sell handmade ceramics or mass-produced dinner sets, how you present them online matters. Customers can’t touch, feel, or examine your products in person. Your photos do all the talking.
Crockery photography, however, presents unique challenges. Glossy surfaces, intricate patterns, and reflections require expert handling. That’s where professionals like LensClicker step in. They specialize in capturing crockery in its best light, ensuring that each piece looks inviting and luxurious.
Understanding the Brand: Dandylines.in
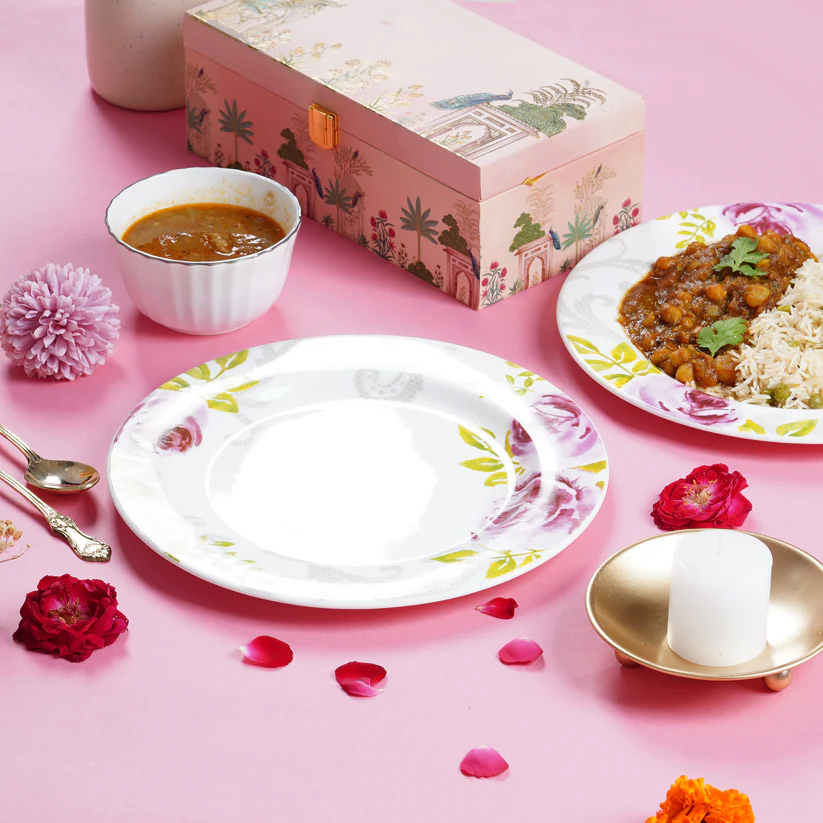
Dandylines.in is a niche brand specializing in stylish, premium-quality crockery. Their products blend modern aesthetics with traditional craftsmanship. For a brand like this, the right images can make a huge difference in attracting buyers.
Why did Dandylines.in choose LensClicker? Simply put, they needed a photographer who understood the delicate balance between art and marketing. The goal was to create visually stunning images that not only showcased the beauty of the crockery but also aligned with the brand’s identity.
Pre-Shoot Preparation
Great photography starts long before the first click of the camera. LensClicker meticulously planned the shoot, considering factors such as:
- Concept & Style: Minimalistic, vibrant, or rustic? Each style tells a different story.
- Props & Backgrounds: Wooden boards, marble surfaces, or fabric textures can elevate the product.
- Lighting: Soft diffused lighting works best to avoid harsh reflections.
- Equipment: DSLR cameras with macro lenses for crisp details.
The Shooting Process
Once the setup was complete, the real magic began. Here’s how LensClicker ensured a flawless shoot:
- Angle Selection: Overhead shots for flat lays, side angles for depth, and close-ups for textures.
- Composition: Balanced layouts to avoid clutter while making each piece stand out.
- Reflections & Shadows: Using reflectors and diffusers to eliminate unwanted glares.
- Consistency: Maintaining a uniform look across all images for brand identity.
Editing and Post-Processing
After the shoot, the real transformation happened in editing. Here’s what LensClicker did:
- Selection: Shortlisting the best images from hundreds clicked.
- Color Correction: Adjusting brightness, contrast, and saturation for a true-to-life appearance.
- Retouching: Removing minor imperfections and enhancing textures.
- Final Touches: Adding subtle shadows, sharpening details, and ensuring a seamless background.
Final Deliverables and Client Feedback
The final images were delivered to Dandylines.in in high resolution, ready for e-commerce listings, social media, and promotional campaigns. The client was thrilled with the outcome, citing an increase in customer engagement and product inquiries.
Key Takeaways:
- High-quality images boost sales.
- A professional shoot saves time and effort in post-production.
- Investing in good photography enhances brand credibility.
Conclusion & Future of Crockery Photography
Product photography is evolving. AI and automation are making editing easier, but the need for creative composition and professional execution remains strong. Brands like Dandylines.in understand the value of high-quality visuals. For anyone selling crockery online, investing in professional photography is no longer optional—it’s a necessity.
FAQs
Crockery has reflective surfaces and intricate details that require special lighting and composition techniques to capture accurately.
Soft, diffused lighting is ideal to minimize harsh reflections and shadows.
They use tools like Adobe Photoshop and Lightroom for colour correction, retouching, and consistency in presentation.
Neutral backgrounds like marble, wood, or matte surfaces enhance the elegance of crockery without distractions.